Showing posts with label change. Show all posts
Showing posts with label change. Show all posts
Friday, March 7, 2014
How to Add or change language in Windows 8
The steps are as follows:
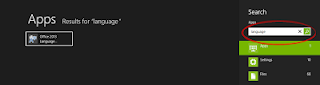
1. Go to the search box by pressing WIN + Q at the same time, then type in "Language" in the search box
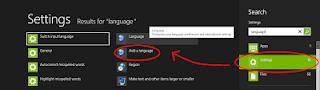
2. Then select the option "Settings" on the search results and select "Add Language"
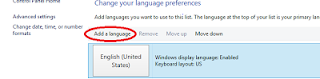
3.The new jendel it will appear as shown below, then click "Add Language"
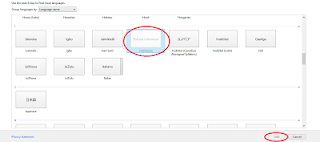
4. Next will come a list of the worlds languages, in this case we select "Indonesian" Then click "Add"
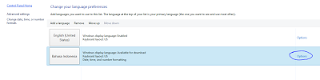
6. Then click "Download and Install Language Pack"
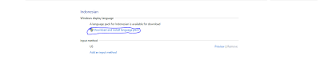
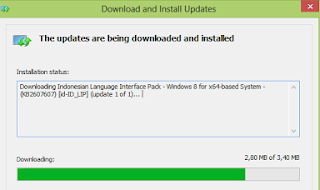
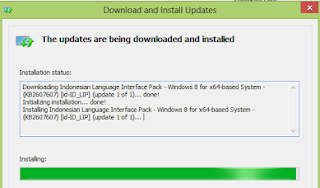
7. Furthermore, the download window and install the update and wait for it to finish
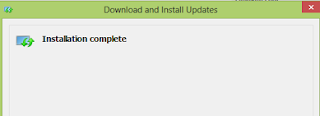
8. After the installation process is finished the next will appear as below, then click the "Close"
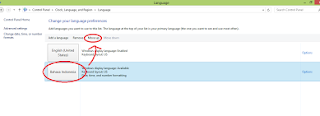
9. Furthermore Indonesian positioned above by clicking "Move Up"
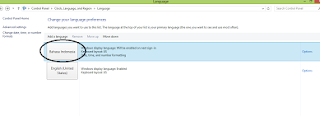
12. Good luck

Monday, March 3, 2014
How to Change Windows 7 logon screen

In other versions of windows you have to use some hacks of third-party tools to change the logon screen. But in win7 you can officially customize your logon screen to your wish.
Follow these steps to change your Windows 7 logon screen.
1) The image should be a .JPG and no more than 245 KB.
2) Image resolution can be your choice.
3) Now download the reg file from here and extract it to your hard drive and double-click on the file to enable this feature (Alternative method: right-click, select Merge).
4) Now navigate to C:WindowsSystem32oobe and here, create a new folder named "Info". Again, create a new folder inside the Info folder and rename it as "backgrounds".
5) Now copy your .JPG pic to this "backgrounds" folder and rename it to "backgroundDefault".
6) Thats it. Reboot your system and see the change.
The following files (sorted by width-to-height ratio) are supported in C:WindowsSystem32oobeInfoBackgrounds folder:
► backgroundDefault.jpg
► background768×1280.jpg (0.6)
► background900×1440.jpg (0.625)
► background960×1280.jpg (0.75)
► background1024×1280.jpg (0.8)
► background1280×1024.jpg (1.25)
► background1024×768.jpg (1.33-)
► background1280×960.jpg (1.33-)
► background1600×1200.jpg (1.33-)
► background1440×900.jpg (1.6)
► background1920×1200.jpg (1.6)
► background1280×768.jpg (1.66-)
► background1360×768.jpg (1.770833-)
Hope this helps you! pls pass your comments.
Wednesday, February 12, 2014
How To Change Mac Address In Linux
Q. How can I change the mac address of network card in my Ubuntu box ?
Ans. Changing mac address is very simple. You only need the command ifconfig. Follow the steps below:
Read more »
Ans. Changing mac address is very simple. You only need the command ifconfig. Follow the steps below:
- Open terminal
- Find the name of your interface, for example eth0
- sudo ifconfig eth0 down hw ether aaaabbbb where aabbccdd is the required mac address.
Wednesday, January 22, 2014
How to Change Blogger Post A Comment with Image
We will show you How to Change Blogger "Post A Comment" text to image in this tutorial. We provide you full step by step guide to replace Post A Comment with an image which is shown above comment box. Many blogger not want to show common word above comment box so here a tutorial about changing it’s to image. You can add your own image and we are also providing some images if you like any one of them then you can use on your blog.

Replace Post A Comment with Image
To replace "Post A Comment" text to an image in your blogger blog with follow below steps:
Step 1.
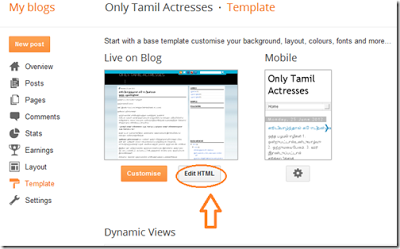
Login to Blogger Dashboard. Go to Template > Edit HTML as shown in below picture.
Step 2.
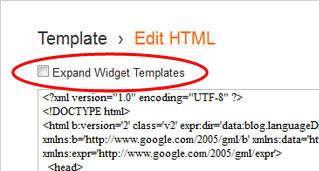
Click on "Expand Widget Templates" as shown in below picture.
Step 3.
Now search following code with the help of CTRL + F:
<a expr:href=data:post.addCommentUrl expr:onclick=data:post.addCommentOnclick>
<data:postCommentMsg/></a>
And also search below code
<h4 id=comment-post-message><data:postCommentMsg/></h4>
Step 4.
Replace <data:postCommentMsg/> to below image code

<img src="https://blogger.googleusercontent.com/img/b/R29vZ2xl/AVvXsEhoOtLIgvLE5SZJHtQNI2DXwt3Z2yqQ87QBudvqQRnZnGkaZqrEj7_SNC4Ka5Dwq1s82flmCMiOeXgn8CgljOaoozWtEfETvqVC3LsoRtBJk82dFRHbaEp63JwV9IUdWCMHau4w6ajSgpVx/h105/leave-a-comment-trans.gif" />

<img src="https://blogger.googleusercontent.com/img/b/R29vZ2xl/AVvXsEgMX7TUsM2asOq-fkJ2-ruxTfuVz1mINjyZ_xerdIMagmsr8DS9ZNvWKuP78WRk3k80cdRahzdtGllW3ibaZdP9_ROdfd0l_86YxQCutr2FMT-zwbpW8Ru7HCOzh2KwD7BlNxyGa9vbTJPS/s180/leave-comment.gif" />Or replace your own image with image source URL.
Step 5.
Save Template.
Now you have done perfectly. If you have any suggetion or updates about codes please give us your update at below form we will publish your updates as soon as possible.
Subscribe to:
Posts (Atom)